
Docker
Install LogChimp via Docker
The LogChimp docker image is an official package maintained by the core team.
Warning
Experience with Docker Compose is required.
If Docker or Docker Compose is not installed on your machine/server, refer to the Docker Compose installation docs.
You can easily kick-start your LogChimp site in 3 easy steps.
Step 1. Create a Docker network
Here, we're creating a network that will be used by both the database and the LogChimp application.
docker network create -d bridge logchimp_network
Step 2. Run the postgres database
docker run -d \
	--name db \
	-p 5000:5432 \
	--net logchimp_network \
	-e POSTGRES_DB=database_name \
	-e POSTGRES_USER=database_user \
	-e POSTGRES_PASSWORD=strong_password \
	postgres:12.4
Step 3. Run the logchimp application
Make sure you're using the correct URL for the LogChimp Docker image ghcr.io/logchimp/logchimp.
As for the PostgreSQL environment variable, it should match in both Step 2 and Step 3.
Replace Fig8=Diq1 in SECRET_KEY=Fig8=Diq1 with a randomly generated string or ID to enhance your LogChimp site security.
Notice, we're exposing two ports here: the first one 8080:8080 is for the frontend and the second 3000:3000 is for the backend.
docker run -d \
	--name your-app-name \
	-p 8080:8080 \
	-p 3000:3000 \
	--net logchimp_network \
	-e PG_HOST=db \
	-e PG_USER=database_user \
	-e PG_DATABASE=database_name \
	-e PG_PASSWORD=strong_password \
	-e PG_PORT=5432 \
	-e SECRET_KEY=Fig8=Diq1 \
	ghcr.io/logchimp/logchimp
After running these commands successfully, you can access your LogChimp site at http://localhost:8080/.
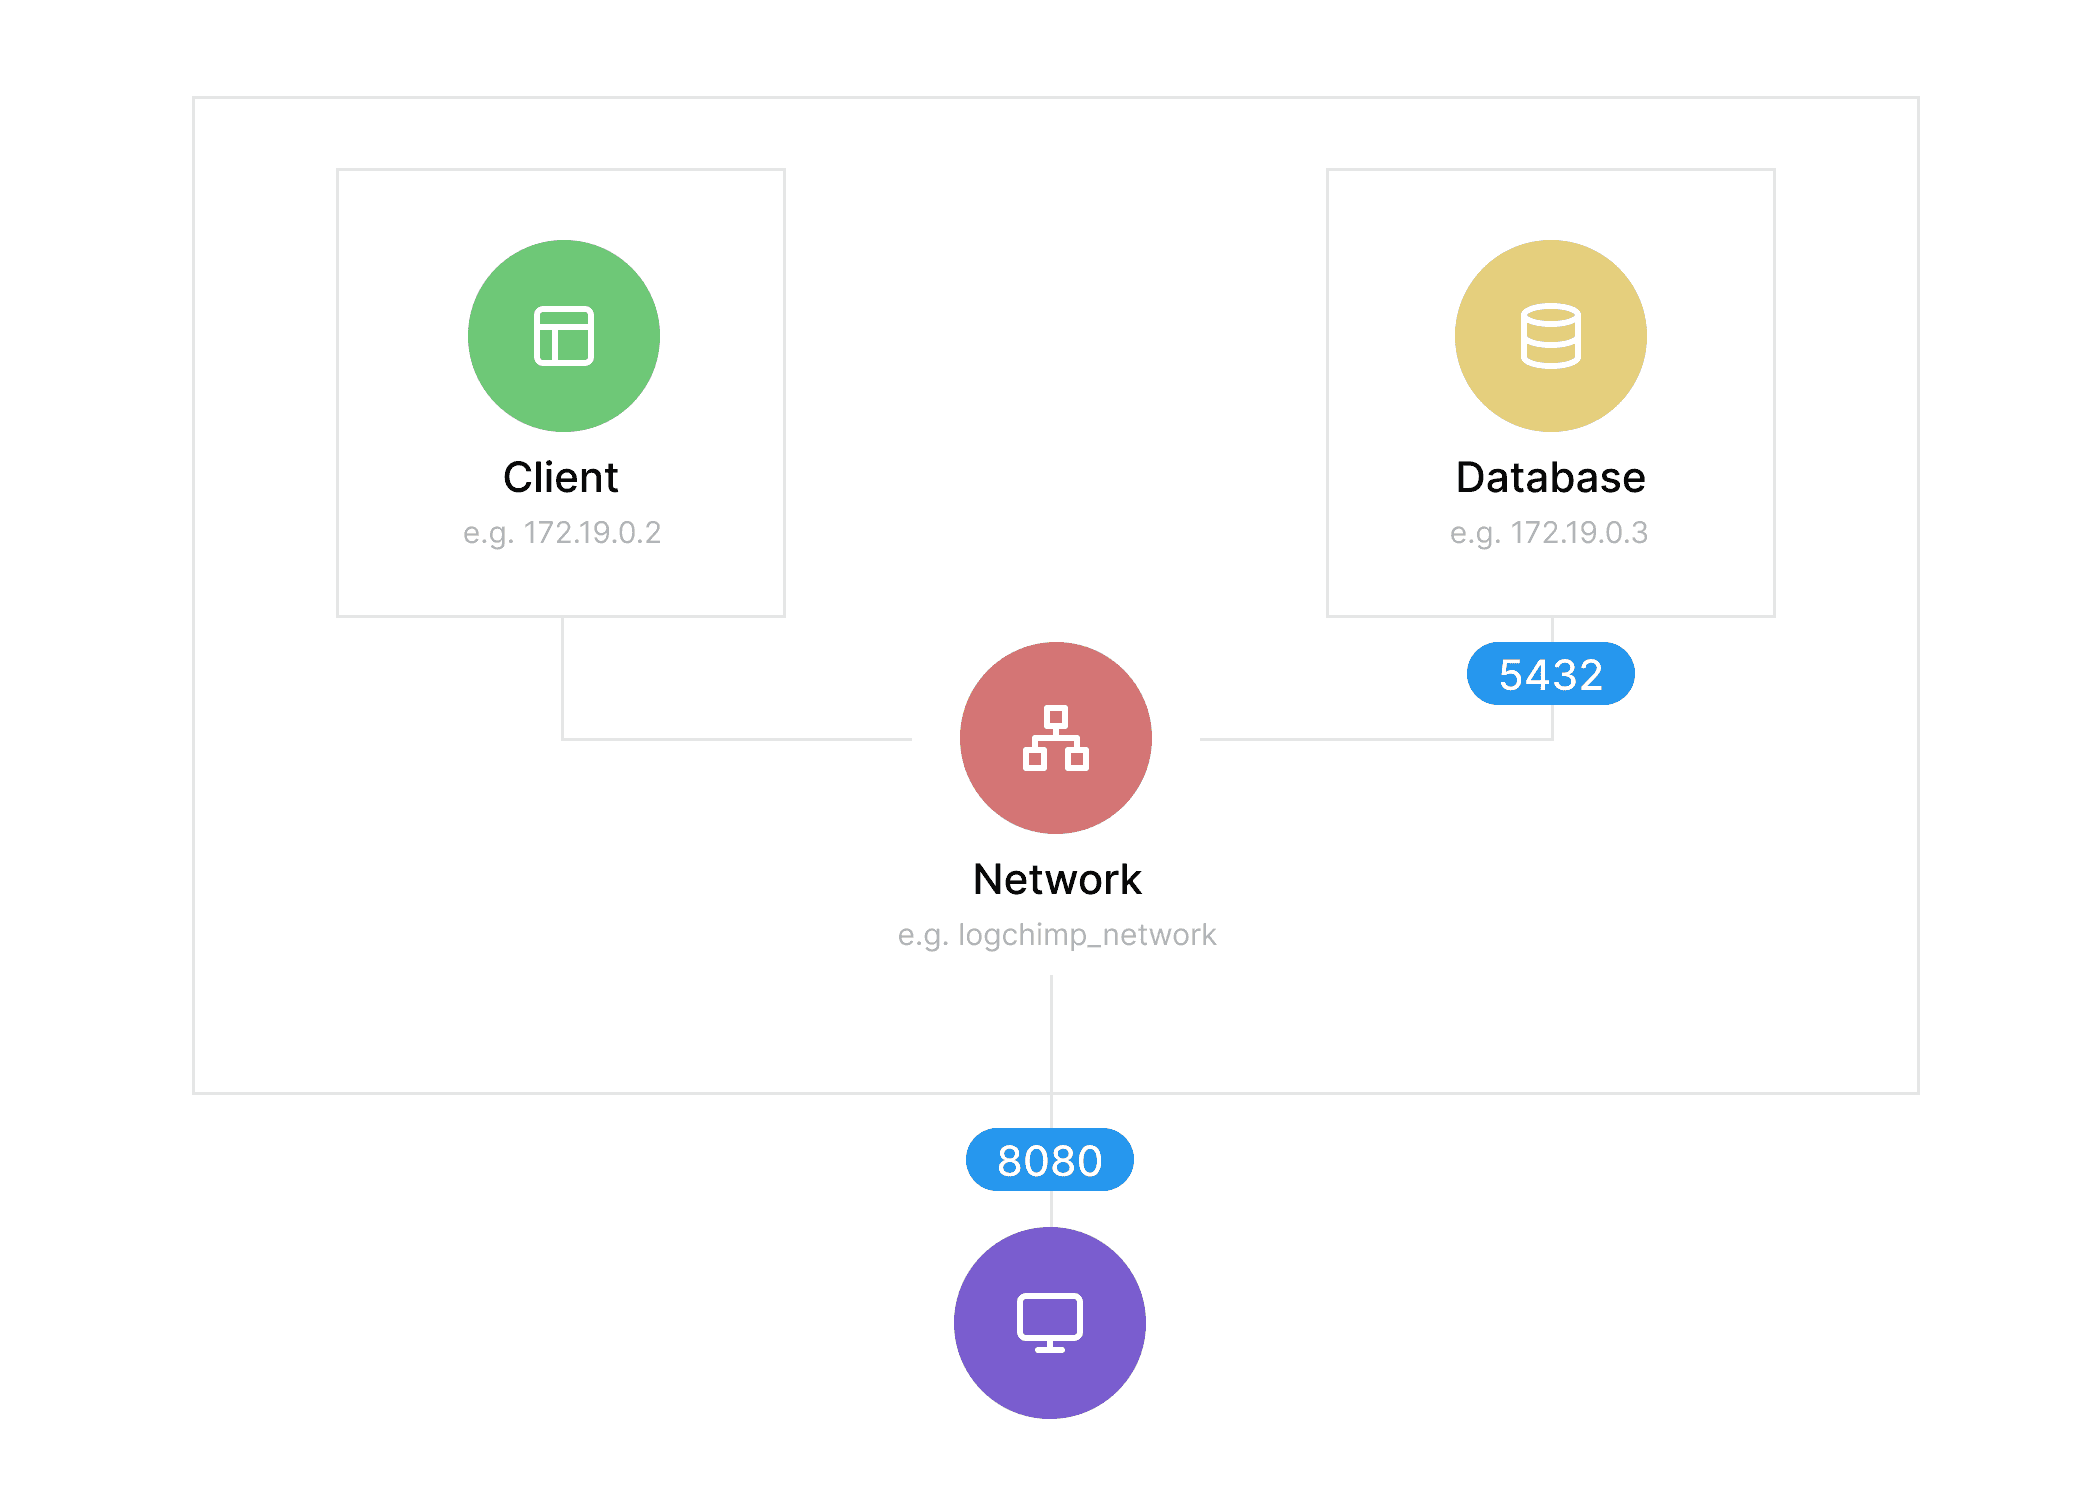
Here's a LogChimp Docker image structure for you to understand (if you're curious) what's happening behind the scenes.
Resources
- LogChimp Docker image on GitHub
- Reporting issues